
If you are interested to learn about the react HOC
React-table is an open-source library for creating tables in the React framework. A table is an arrangement which organizes information into rows and columns. It is used to store and display data in a structured format. The react-table is a lightweight, fast, fully customizable (JSX, templates, state, styles, callbacks), and extendable Datagrid built for React. It is fully controllable via optional props and callbacks.
Features
- It is lightweight at 11kb (and only need 2kb more for styles).
- It is fully customizable (JSX, templates, state, styles, callbacks).
- It is fully controllable via optional props and callbacks.
- It has client-side & Server-side pagination.
- It has filters.
- Pivoting & Aggregation
- Minimal design & easily themeable
- Column Ordering
- Animatable
- Virtualizable
- Resizable
- Server-side/controlled data/state
- Extensible via hook-based plugin system
Installation
Let us create a React app using the following command.
$ npx create-react-app myreactapp
Next, we need to install react-table. We can install react-table via npm command, which is given below.
$ npm install react-table
Once, we have installed react-table, we need to import the react-table into the react component. To do this, open the src/App.js file and add the following snippet.
<strong>import</strong> ReactTable from "react-table";
Let us assume we have data which needs to be rendered using react-table.
const data = [{
        name: 'Ayaan',
        age: 26
        },{
        name: 'Ahana',
        age: 22
        },{
        name: 'Peter',
        age: 40
        },{
        name: 'Virat',
        age: 30
        },{
        name: 'Rohit',
        age: 32
        },{
        name: 'Dhoni',
        age: 37
        }]
Along with data, we also need to specify the column info with column attributes.
const columns = [{
       Header: 'Name',
       accessor: 'name'
      },{
      Header: 'Age',
      accessor: 'age'
      }]
Inside the render method, we need to bind this data with react-table and then returns the react-table.
return (
     <div>
        <ReactTable
            data={data}
            columns={columns}
            defaultPageSize = {2}
            pageSizeOptions = {[2,4, 6]}
         />
     </div>
)
Now, our src/App.js file looks like as below.
import React, { Component } from 'react';
import ReactTable from "react-table";
import "react-table/react-table.css";
class App extends Component {
render() {
const data = [{
name: 'Ayaan',
age: 26
},{
name: 'Ahana',
age: 22
},{
name: 'Peter',
age: 40
},{
name: 'Virat',
age: 30
},{
name: 'Rohit',
age: 32
},{
name: 'Dhoni',
age: 37
}]
const columns = [{
Header: 'Name',
accessor: 'name'
},{
Header: 'Age',
accessor: 'age'
}]
return (
<div>
<ReactTable
data={data}
columns={columns}
defaultPageSize = {2}
pageSizeOptions = {[2,4, 6]}
/>
</div>
)
}
}
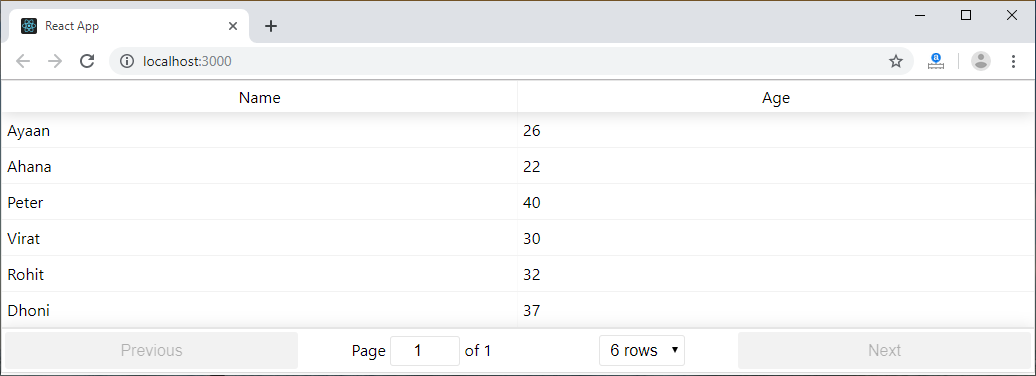
export default App; Output
When we execute the React app, we will get the output as below.

Now, change the rows dropdown menu, we will get the output as below.
When not to use react-table
Consider another React data table library when you need:
- Default support for fixed headers and columns
- Out-of-the-box support for horizontal and vertical scroll for both touch and non-touch devices. react-table doesn’t dictate the UI; it’s headless, so it’s our responsibility to define the UI based on our need
- Support for inline editing of columns. We can achieve it in react-table, but it’s out of scope for our table to do it. We need to create a plugin or component on top of it to support such features. react-table stays true to its name and is best for rendering simple tables
- Infinitely long tables like a Google Sheet. Performance-wise, it can’t handle such a large list; it works well for medium-sized tables but not for long ones
Use cases for react-table
- For simple tables that need basic features like searching, sorting, filtering, etc.
- Sports leaderboards/statistics, finance data table with custom elements

